The thoughts that were thunk and the goings on of my life.

Tuesday, November 27, 2012

Costa Rica - Trip Report

I got the chance to come to Costa Rica on a business trip (I know, hard times at work for me).

Drake Bay - 
Very muddy. Not polluted, just muddy, so don't ever come here with some dream of white-sand beaches, because that's not going to happen. But all that mud makes for something pretty amazing, which I'll talk about later.

Agujitas - Main town of Drake Bay (map)
Has only a few hundred residents, and they all seem to be good and chill folks. One thing that's really nice is it's a small enough town that they aren't constantly saying, "Hey friend! You need a..."

Hotel (Cabinas Manolo)
Nothing to worry about here...
...just electric wires running into the shower head

Activity List:
  1. Walking the bay
  2. Horseback Ride
  3. Night Bug Tour
  4. Corcovado (at Sirena)
  5. Sea Kayaking (aka sit-down surfing)
  6. Gringo Curt's
  7. Magic in the ocean

Walking the bay
Walk along the beach, very wide while tide is out. Sand gives way to rocks, and then comes a muddy sand concoction. Sticks to the top of your toenails. Little holes in sand that absorb then glug after waves, must be a little creature; try to dig quickly to find what it was, but no luck. See rocks with barnacles, toss rock onto one to see what they look like...feel guilt for killing a barnacle. Stand still, realize rock is teeming with life. Small tadpole-looking fish in the puddle. Crevice of rock is its own ecosystem. Thousands of crabs smaller than flies. Move and they all hide, hold still and they slowly emerge. Crabs, snails, fish, hermits, flies, glugging oysters, barnacles wiggling in their castles. Then one hand wave and silence again.

If you stay still, life is all around you.


Horseback Riding
First time riding anything of significance, going along some roads to see a waterfall in the jungle (I think it's here). Total time of about 2.5 hours. Unfortunately guide speaks as much English as I do Spanish. While it makes for a quiet trip, he's a pleasant guy.

Couple notes though. As a 2m, 100kg guy these horses were pretty tiny. I felt really bad hopping aboard, but mine (Marlboro), didn't seem to mind. We get moving and I find out that the horse isn't the only thing that's too small...so is the saddle, and by a LOT. But I make due, and within a mile or so things start feeling pretty normal.

Moving along, the speedy bits are rough, and it's hard to put weight on bones because the legs on the saddle are so short, and I'm so far up the buckles are really digging into my shins. Oh well, it's like a rental bike, they will work, but they certainly aren't what you'd ride everyday. Things go well along the road, then we get into some sections that are about as sketchy as any dirt road you'd ever see back home. Then it gets steeper and more downhill and I realize...Cowboy pants are really just Under Armor for the 1800s. Keep it high, keep it tight, or it'll keep you from moving. Also know now why a bicycle seat is not called a seat, but a 'saddle' They feel very similar and everything is actually pretty comfy when the weight is on the hard leather and via my sit-bones. Want to use this as an example from now on when people are like, "Your seat is too hard." And I'll be like, "Cowboys don't say that they want comfy memory foam saddles, and neither to I; because if you're working you need the firmness.

So we're pacing down this road and then it crosses a river, no big deal. Except instead of crossing we go up the river. This river is more rapid-filled than anything a Texan would go tubing on, but despite my questioning the guide indicates that's where we need to go. Not bad for a ways, but then it gets deeper and faster, and eventually the water is up to my knees and the poor pony is tripping on the very rocky surface underneath. Basically I make his life suck. He could be playing in a field nibbling greens, but instead a jerk is on him making him walk along. 

But then a weird things happens. I realize that he knows exactly where he's going. I'm not guiding him he's just doing his thing. So instead of working to keep everything in order I just let go and he does his thing. Finds the path, hits a shore, finds a new path, all the while trudging forward. Then I start to realize that for real hose people that these animals are more like a pet than a transit method. They're much like my dog, they just want to be outside and moving along...but unlike him in that they're worried that they might be somebody's dinner, instead of the one feasting. It's probably the only prey-animal that humans have this type of relationship with, which I find interesting. I end up having lots of other thoughts about horses during the ride, some profound in the moment; others realizing I'll never know the answer to because I don't know the words in Spanish and can't ask my guide. Ultimately though I'm really impressed by the abilities of horses to just auto-pilot, handle terrain that no other vehicle possibly could, and with how nimble they are even when loaded down. Mr. Horse, you're awesome.

Get to the waterfall and it's nice. Not like anything in Oregon, but beats anything in Texas by a long-shot. Looks like there's a mini-power-station built into it...they gotta figure out how to cover that up. I pulled out the fancy camera(which I instantly regretted bringing the moment the 'small road' ride turned out to actually be a 'spend the whole time in river which could instantly destroy your really fancy camera' ride), and boom. Instant fog. Can't see a thing. Fortunately my much worse little camera phone worked just fine and I got this shot.

Sup waterfall! Bet you like getting down.
The ride back was much more pleasant and the ponies seemed to like it more as they didn't have to fight the water. And since we were flowing with the stream we were quieter and saw more animals. Basilisks were everywhere and I even saw one of them running on water. There were also lots of other little skinks and iguana-like critters. Saw a few king-fisher looking birds, and the best find was some black and yellow and red toucans. What's funny about them is that their beaks are so big they have a hard time flying. I'm sure there's some evolutionary razor where they need a big beak to impress the ladies, but every now and then one gets a beak so big that they can't fly properly and take themselves out of the gene pool.

One thing really cool about the river (Rio Agujitas), is that it is is glacial-blue color. Really cool looking, I wish I could have taken a picture of it, but it was clean and clear when shallow, but really cool looking when more than a few feet deep. Unfortunately I don't know if I'll ever find out why.

Climbing out of the river and back to the hotel was really smooth and better than expected. Started to get the hang of the motion in the saddle, and I'll count it as the ab workout for the day. Got back to the hotel, expected to pay the guy, but he was like 'No you pay at the hotel.' So I was a little confused, but confirmed with my hotel and bid the guide farewell. He kept hanging around for awhile, wasn't quite sure why, but eventually he took off. Then I realized...

...he wanted a tip. But surely I pay the tip when I pay for the ride? Well, after talking with the hotel, no, that's not the case. Crap. Didn't pick up on the social cues until it was too late. That's one thing about this country that's really hard. A lot of things tip is included, some it's not expected, and others you're a big jerk for not giving one. What's hard though is that there doesn't seem to be any consistency on which activity falls in which category. Sorry horse-dude, I suck and if I see you later I'll try to make up the disappointment for you.

A little downtime and some dinner for now. Here's hoping that bug lady is just like our neighbor across the street.


Night Bug Tour
Got a recommendation from Curt over at Gringo Curt's for a night-hike with Esteban. Evidently he has a much bigger property to work with than most people, which means you have more walking options and therefore the animals aren't overrun with tourists. (Night Time Jungle Hike)

Instead of seeing some bugs (many of which are variants of things back home, or we would have seen on our last trip to Monteverde), we got to see a huge diversity of wildlife. Roosting song birds, tiny frogs, huge frogs, fresh-water shrimp, glass frogs, opossum, armadillo, egg sacs for tree frogs, moths, kinkajou, and poison dart frogs.

Words aren't really the best descriptors on these things, so check out this album: 

The one thing I couldn't capture in photos was when in the middle of a trail Esteban told me, "Turn off your light." Once I had done that he said, "Now wait a few moments." After waiting a few moments it looked like my eyes were playing tricks on me and I saw something glowing moving towards me. Then Esteban said, "You see this? This is glowing fungus. Now look around you." I looked around and there were little trails of glowing light heading off in every direction. It was magical; seemingly straight out of Avatar where she tells him to put away his torch and suddenly the forest comes alive with light...although with way less movie-magic and sexy blue natives. 

Corcovado National Park - Sirena (map)
The beauty of Costa Rica is in it's life. It's people, it's plants, it's myriad of animals. There's a really unique place in the Osa Peninsula called Sirena. It's only accessible by small plane or boat (or hiking); and the beauty of that place is that it's at the intersection of multiple geographical and climate regions. Basically there's a bunch of mountains over there, a fast-cool river on one side, a slow mangrove river on the other side, and a forest in between that's fairly new growth so it really supports life like nothing else. Because of that you end up having the chance to see more animals than you would almost anywhere else in the world in that amount of time. 

The trick to anything with animals though is that unlike humans they don't have to work. So they wake up with the sun, busy themselves about finding breakfast and then just hang out and digest and relax until about later-afternoon when it's time to start worrying about dinner. That means if you want to see anything you need to be around as close to (or even before) dawn as possible. Therefore we get in our boat about 6am, and make the surprisingly long-feeling 1:15 boat ride from Agujitas to Sidena. We got there around 7:30, which is decent, but a tad late if you really want to see everything in action. Fortunately even arriving late at this place is not too big of a deal. We only walked 3.7mi in the 6 hours we were there and managed to see SO many animals...here's some of the highlights off the top of my head:
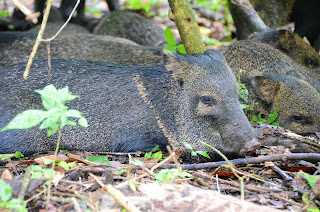
  • Wild boar

    Reek of boar-pee, see us and saunter nearby. But when one person stands up (huge wildlife no-no if you want things to stick around...always get smaller), they take off running banging their teeth against one another as they go...so glad those teeth weren't aimed near us.
  • Toucans

    They're big, beautiful, and Toucan Sam does an incredible job of perfectly capturing what they look like. Downside is they're kinda like blue jays, while they might be pretty they are pretty much jerks to all other creatures around them
  • Spiny-tail iguana

    Had one of these growing up, but they're something much better in the wild. Really impressive how healthy and stout this guy was.
  • Osprey
    Hanging out by the sea after having just eaten dinner
  • Myriad of birds
    Most small and brown/black tones, the occasional one with bright markings, fun to watch, but hard to get in a picture
  • Spider Monkeys
    Love their prehensile tails, makes for a really neat way of being able to relax while eating. Basically they look more like mountain climbers in harnesses in their movements than any other type of monkey I've seen.
  • Other Animals with fewer notes
    Agouti, Red Deer, Army Ants, Leaf-cutter ants, iguana, scary spiders, harmless spiders, crocodile, gajillions of hermit crabs, half a gajillion other crabs
  • Tapir

    We got really lucky to see one of these. There's only about 2000 left in the whole world, and they are the only American relative of rhinoceri. They look like a combo between a rhinocerous and a big pig. We found ours chilling in the mud, eyes closed, but ears alert to every sound
  • Boar Family

    It started raining really hard, and all the animals sought shelter. We happened upon a family of boar who were trying to find a dry spot, but the cool thing is that because it was raining they basically were like, "Hey rain sucks, you can hang out near us, but this is our place and we've got our eyes on you." After that moment we were able to get just a few feet away from them and picture it up. The rest of my group left, but I liked the moment so stuck around. And the reward was worth it. Turns out amongst the adults was a little bitty piglet nose poking out between two of the bigger ones and wiggling around in the air. I saw their baby and it was adorable!
One of the things guidebooks say to do is to avoid the wet season (or even go for the more BBB-type term: Green Season) because you'll probably experience rain and won't have blue skies the whole time. For me personally this is kinda crazy. The reason the rain forest has life is because of the rain. Water is life. So why would you not want to experience the forest in that moment too? We got to experience a pretty torrential downpour, every inch and crevice of my body was soaked through, but you know what? It didn't matter. It's so warm there it's not like you'll get cold, and it puts a different spin on the whole ecosystem to see what all the creatures do during the rain. I guarantee that I wouldn't have seen a cute little piglet nose if they hadn't been sheltering from the rain and knowing that we were likely doing the same. Plus without the rain you don't have as much fruit, as many flowers, or as many of the things that can migrate. Point being: The wet season (aka Green Season or summer) is not a thing to be avoided, it's what gives this place life.

After about 11am there stopped being much of interest going on. We found a thing here or there, but we were also a bit weary of being on full alert looking for stuff.

Conclusion of Sirena:
Sirena is basically a zoo, but with actual wild animals in their real habitat  It's an experience that would be hard to duplicate anywhere else in the world. However...

You need to get their earlier than most of the tours that are leaving from Drake Bay (or any other city), I would really recommend staying there via tent-camping, or staying at the ranger station, so that you can wake up right at dawn and see the forest coming to life all by yourself. Once the rest of the tourist start showing up on the boats around 8am, you'll have had 2-3 hours of animal watching, and can do a little eating and relaxing for yourself.

Another option I learned about is a tour guide that will take you extra-early to Sirena (from Drake Bay), and after most people start showing up (only like 20-30, but still no people is better when looking for animals) he'll take you to some Primary Rain Forest that's never been disturbed by man (San Pedrillo). It costs a few dollars more, isn't offered by the tour-groups, but Gringo Curt can point you to the right person if you have a group of 6 or so.

Sea Kayaking
I was too tired (and had a massive no-caffeine and too-little-water headache) to go kayaking. I guess it's just something I'll have to save for later. I really like the idea of getting to know the waves better in a manner that's easier to do than surfing. Oh well, it's always good to leave yourself wanting more.

Gringo Curt's (website)
This was definitely one of the highlights of the town. While having locals is always a good thing, sometimes it's best to have a catalyst between the native people and your inexperience so that you can really enjoy the place without getting either swindled or a canned experience. Gringo Curt (or just Curt) is that catalyst. He knows everybody, uses his free time to take in the whole area, and can hook you up with all the right people for whatever it is that you're hoping to do. He owns a little restaurant called Gringo Curt's (Trip Advisor) and makes only 3 items, fish tacos, fish fillet and something else...I don't really know what the 3rd one is because the 2nd one was so good that's all I ever ordered and likely that would stay the case even if I stayed there for a week. In a world of places like Cheesecake Factory where they try to be a master of all things for all people, it's really refreshing to have a place that simply says, "I do this well, so why do more." And he's totally right.

Gringo Curts ended up being a lively hub with a full cast of characters. From local ex-pats that have been there for decades, to people that came months ago and just haven't left, and the locals popping in and out to chat and borrow things. Good times all around, but keep a relaxed attitude and don't kill the positive vibe by being overly picky or complaining about this or that(like humidity or bugs...they're there, they're part of the experience, deal with it).

Magical Ocean
Per Gringo Curt's recommendation I made it a goal to see something that's really unique in the world: Bioluminescent Dinoflagellates

Or in layman's terms: Cool glowing plankton

It's really hard to put into words how amazing these things are. You can't really go to Google and search for images of these things as camera's just can't capture it, but if I had to describe it in one sentence:
Seeing these was the most other-worldly and one of the most delightful experiences I've ever had in my life. 

It has to be pitch-dark out. New moon, ideally clear, no major cities for miles and miles, and even then you might not find them as they aren't everywhere. They typically float from place to place, but in a few rare bays in the world they 

This is the best picture I've found for the color:


But the general glow captured here is NOTHING like the experience of being in it. Of stiring your hands and watching the water glow around them. Of paddling and seeing remnants of where you've been. Of gently wiggling your fingers and seeing them outlined in glowing pixels. Of lifting your hands into the air and watching a cascade of light pouring down you. It's like the movie Avatar is real, and all you have to do is walk into the ocean.

Other things happened on the trip, got home safely and whatnot, but the piece that will be most deeply etched on my mind is on these mesmerizing little blue dots that only light up when you make them.

Conclusion
Despite only having 46 hours to soak in Drake Bay, I felt like I had the best experience I could possibly have imagined. No, it was even better than that. Sure not everything was perfect, but this was the Costa Rica that I had hoped to find, and leaving was oh so hard, but it was nice to know that I had just scratched the surface of all there was to do here and I hope to be back one day to take in even more.

Sunday, November 11, 2012

Calories Burned During Childbirth

During our birthing class the instructor said something that set off my truth-o-meter:
During childbirth you will burn about 50,000 calories

I thought it would be pretty easy to debunk this, but didn't want to harp on it during class and look like a jerk; however, there's no way it could be true, right?

So then an internet search found...
  • Rumor has it that you burn about 50,000 calories during the typical labor. -Chacha
  • aparently 50,000 - Baby Forums
  • On google it says up to 50,000 - Baby Expert
  • She said during her child birth classes she was told about 50,000...but like other people said it depends on each labor because every labor is different!” - Baby Forums
  • Up to 50,000 calories during the typical labor!
    and
    I just looked up the figure and the consensus seems to be with Invisible Pink RN. 50,000. - Yahoo Answers

...ok, so maybe this IS real? Time to put this theory to the test.

Can you burn 50,000 calories during labor?

Let's look at this from a few different angles: weight loss, heat dissipation, and maximum known calorie burn rates.

Weight Loss:
Q: How much weight would you lose if you burned that many calories?
A: Fat has about 3500 calories per pound. 

50,000 cal / 3500 calories per pound = 14.2857 lbs

Therefore if this stat is true, during a birth you'd lose over 14 and 1/4 lbs of fat!

Well shoot, that doesn't seem likely unless you count the baby and placenta as 'calories lost'. But then you'd have to burn the baby for the statement to hold true...and most hospitals don't allow infant sacrifice.

Heat Dissipation:
Q: Since burning calories ends up just creating heat, how hot would you get if you burned 50,000 calories during birth?
A: Let's look at one of the most intense physical activities there is, running a marathon. I'm not talking jogging, I'm talking actually running and hard. One of the real limiting factors when you're at your threshold is simply cooling yourself. Just look at times for warmer marathons; there definitely slower.

How many calories do you burn during a marathon?
Depends on the person, but looking at the top marathoner's time (2:03:38; we'll call it 2 hours), and how much they weight (about 125 for this more elite group), and combine it with a calorie calculator (this suggest about 2500 calories).

This means that they burn about 1250 cal/hr and weigh about 125lbs (~56kg). A calorie by definition is the amount of energy it takes to raise 1 kg of water 1 deg celsius. This means the marathoner is able to dissipate about 22 degrees worth of heat per hour.

So let's say that birth is a 16 hour process. 50,000 calories in that time equals 3,125 calories per hour. This is about 2.5x as many calories as a top-marathoner. It means you'd have to burn 55 degrees per hour; but since a marathoner is really cooling as much as humanly possilbe it means...

If you burn 50,000 calories during birth your body temperature is going to be 70 degrees celsius; which is 158 degrees Fahrenheit for you Americans.

...hmm, that doesn't seem very likely.

Maximum Known Calorie Burn Rates
What's the maximum calories a human can burn for any duration?

Here's a good list: http://www.nutristrategy.com/activitylist.htm
About the max you can burn is 1500 cal/hr...and even then only if you're cross-country skiing uphill and weight 205 lbs.


Conclusion
So I think we can very confidently say:
It is completely impossible for anybody to burn 50,000 calories during labor

But what is the answer?
Most women don't want to be hooked up to a set of lab equipment to accurately read the full metabolic effects of birthing; but it all depends on the labor. Some ladies can go start to finish smoothly in 2 hours, others have a sufferfest for over a day.

Sure in pain-per-hour birthing wins pretty much everything. You'll probably burn in the high-hundreds to a few thousand calories depending upon intensity and duration of the labor.

So why is the 50,000 number circulating? 
Simple it's a self-perpetuating myth. Most people heard it from their birth instructor, who double-checked it on the internet, where somebody was already saying what that instructor said. Once it got in a google search it became a self-fulfilling myth.

Bottom line:
Don't use birthing as an excuse to stuff 50,000 calories in your face...but if that's what your wife wants to do, don't tell her no in that moment either.

Friday, October 19, 2012

Brew In a Bag - Modification for Betterfication

I brew beer. I love it. It's a great hobby, and it has a tasty tasty reward.

Until recently the only method of brewing I've ever done was Extract or Mini-Mash. I've wanted to do all-grain for awhile, but the setup is pretty crazy expensive and takes up a bunch of space that I don't have in my little house. I thought it was a lost cause until I learned about Brew in a Bag (BIAB).

The purposes of this post are because while I like BIAB, I think there's a few flaws with the method and I think I've found a way to improve the process so that it's even lazier! In fact, my method of BIAB (let's call it the Otis BIAB Method) is so easy that the actual work involved is way less than even doing a mini mash.

Let's begin...

Otis Brew In A Bag Method

Equipment needed:
  • Gas/Propane Burner
  • Large Pot
    At least 6-7 gallons, I use a Turkey Fryer
  • Digital Thermometer with alarm
    • I used this, but be careful not to burn the cord, or let water get in between the lead and the metal
  • 5 gallon water cooler, like this
    a 10 gallon is fine too
  • Large mesh grain-bag
  • Grain for brewing
  • Strike Temp Calculator
    Any one of many online ones will work
  • Large spoon for brewing
  • A-frame ladder
    or a good anchor point at least 6-7 feet high
  • Ratcheting tie-strap
  • Medium pot
    2 to 2.5 gallons
  • Hops and all the other fun stuff to make beer

Brewing Process:

Mash the Grain
  • Put about 5 gallons of water in the Large Pot and heat to the calculated Strike Temperature
    • Use a Strike-Temperature Calculator like this: http://www.rackers.org/calcs.shtml
      I've found my strike temp is usually in the 165 - 170 F range
      • Mash Thickness in a 5 gal cooler will be 20qts / # lbs of grain
      • Desired Strike temp is 150-155 F
        • 155 F is better if you like a more grainy-tasting beer
        • 150 F is better if you want a more subtle beer
      • Temperature of Grain is whatever the room temperature is that the grain is in
    • Also consider adding a pH balancer like 5.2 pH Stabilizer
    • Use the digital thermometer's alarm to tell you when it's at the right temperature
  • While the above is heating, put grain bag in the cooler, then pour in the grain.
  • Once strike temperature is reached on the water pour it over the grain in the cooler
    • Make sure to stir a bit to get out all the bubbles
    • Fill to just about the brim on the cooler
  • Put the lid on the cooler and wait for at least 90 minutes
  • You're done for awhile, go do something else
Note: This method is only proven on beers with <7% alcohol, and supposedly BIAB doesn't work well for high-wheat-content beers.

Drain the Grain & Sparge
Once the time is done on the mash, you need to lift out the bag of grain, but it's heavy so you'll need to do it this way if you're lazy.
  • While you're doing this you should start heating up 1-2 gallons of water to 170 F for sparging
    • Use the digital thermometer to alarm when it's ready
  • Set up an A-frame ladder over your cooler
  • Hook the ratcheting side of a tie strap directy above the cooler
  • Open the cooler and tie a knot in the top of the bag
  • Make a loop on the strap side of the tie-strap and slip the knot through
  • Ratchet the grain bag out of the wort
  • Once above the water line, swap the cooler beneath the bag for the large brew pot
  • Then slowly pour all of the liquid from the cooler over the grains
    • Try to give all the grains equal love
    • This step filters most of the extra crap in the beer, meaning you get more beer that tastes better and looks cleaner at the end
  • Once the sparge water is hot enough, pour it over the grains in the bag and let it drip into the large brew kettle
    • You may need to ratchet the tie strap up a bit more if you find that the water level is nearing the bottom of the bag
  • Give this plenty of time to drip dry
  • You should not have a large brew pot almost full of wort, fill it up with extra water to the desired boil volume
Total Time Before Brewing: 2-2.5 hours
Total Effort Before Brewing: 30 min, maybe.

Brewing
Once the wort reaches a boil brew like you normally would per the recipe
You might want to add some Whirlfloc or Irish Moss though, as it will help eliminate the increased haze that comes from the BIAB method.


Why is this easier than standard BIAB?
  • Just bring water to strike and sparge tempertures, no watching things.
  • Cooler holds a steady temperature and won't need re-heating over the 90 min steep
  • Do whatever you want during the steep
    • Last batch I went to a park, played with my dog and wife, did some hiking together, went grocery shopping, at lunch, and started watching football all while 'brewing'
  • No chance of burning a grain bag on the pot
    • Can use full-force heat for all parts instead of more-slowly ooching up the temperature.
  • Ladder is easy to set up and take down
  • Ratchets make it super-simple to lift the grain bag and hold it in the exact right spot for a long time
  • Using a digital thermometer means you don't have to watch anything, just listen for beeps
Why is this easier than mini mash?
  • Longer steeping time means you have plenty of time to do other things
  • Steeping in a cooler with this much water means temperatures won't fluctuate much
  • No bringing things to a boil only to then cut flame, then bring back to a boil
  • Also, it tastes much much better
Closing
I'm not an expert, but I've done 3 batches this way and really love the ease of everything, and the beer produced is by far the best-quality beer I've ever made. The flavors are also much cleaner and complex than anything I've done as an extract or mini mash.

If you have or can use a 5-gal cooler, then I'd at least give this a try. Sure it's not going to be quite as good as something from a 3-tier proper brewing setup, but it's really really close. Seriously, it doesn't get much better than this.

Thursday, July 26, 2012

Motorola MotoACTV vs Garmin Forerunner 305

My wife needed a better heartrate monitor (aka I wanted a new toy), so I got a Motorola MotoACTV to replace my Garmin Forerunner 305, which after this post is hers.

Motorola MotoACTV

VS

Garmin Forerunner 305
Initial Impressions
MotoACTV - Amazing, sleek, sexy. It looks awesome, weighs almost nothing, and is a great toy to show off. Much prettier than any offering out there for this type of device, period.


305 - Clunky, ugly, never a looker, but looks like it will get the job done.


Price
MotoACTV - MSRP $250, but can be found for about $190 on Amazon. Comes with headphones and watchband.


305 - MSRP $199, but prices online tend to be higher. Comes with watchband.


Bike Mount
MotoACTV - Seriously deficient, they need to upgrade this mount. If you accidentally slide it in the direction that you inserted it, it WILL fall off your bike. The retention tab is simply too small and too flimsy to be effective. This is my biggest disappointment with the device.


305 - Excellent, secure, not going anywhere.


User Friendliness
This one isn't even fair. The MotoACTV is newer and better on every single front. There's simply no comparison. Setup of bikes, profiles, connectivity, everything is easier.


Display
See User Friendliness above


Performance
MotoACTV - Despite some claims of poor battery life I'm only losing about 10% per hour, which means it should last about 10 hours. I've used it for a max of 6 hours in one day and it still had about 30% juice left.


305 - Should last 8 hours, but due to not auto-shutting off after I stop a workout I often leave it on and it  drains the battery, which means many rides end up not being captured due to a dead battery caused by a combo of user-error and poor design.


Waterproofness
Provided you don't do a lot of underwater cycling both should be fine. If you do, the 305 wins.


Exporting Data
MotoACTV - Motorola does a great job getting everything auto-synced via wifi to their accounts; however, they do a terrible job of letting you use anything other than their site. This is a Big 'I' vs little 'i' problem.


Strava is currently working to make importing happen. In the meantime you have to do the following to get your data from MotoACTV.com over to Strava or Ride with GPS (or any other similar site):
  1. Go to MotoACTV.com and login to your account
  2. Find the ride of interest
  3. Click on Workout Stats
  4. Click Download
  5. Convert the CSV file you downloaded into a TCX file - I use this
  6. Go to Strava
  7. Click Upload Activity
  8. Navigate to the TCX File & Import
This process is needlessly complicated, and I'm sure a good solution will be developoed soon. Most likely it will be Strava will figure out how to import the CSV files; but hopefully what will happen is that MotoACTV.com will allow you to export data (at least cycling data) as a TCX file.

305 - No problems, just login to Strava, Upload, and done.

Route-Tracing Comparison
I ran a test using both devices started at the same time, on the same bike, on the same ride. I also chose to focus in on a small section where we went along the sidewalk, that way there's no question as to what my exact path was. Here are the results:


Figure 1 - Route overlay using Strava & the Garmin Forerunner 305

Elevation: 596 ft
Max Speed: 33.4 mph

Note: Avg Speed, Moving Time, and Calories are all different due to user error.

Figure 2 - Route overlay using Strava & the Motorola MotoACTV

Elevation: 740 ft
Max Speed: 36.1 mph

Strava doesn't have the best elevation mapping though, so I thought I would try and import things into RidewithGPS.com and see if that would change things up much -
Figure 3 - Route overlay using Ride with GPS & the Motorola MotoACTV
Elevation: 786 ft
Max Speed: 36.2 mph

Finally for fun, here's one of my buddies who rode in the same group-ride with me using a new (April 2012) Garmin Edge 500:
Figure 4 - Route overlay using Strava & the Garmin Edge 500

Elevation: 695 ft - but different rider, slightly different route, so that could explain that difference...likely not +/-100 ft difference, but who knows.

Route-Tracing Comparison Conclusion
I really didn't expect this to be the case, but...

The Motorola MotoACTV is more precise and accurate than either the Garmin Forerunner 305 or the Garmin Edge 500. Oddly enough, the Garmin Edge 500, despite being a stalwart amongst cyclist was the least-accurate of the 3.

Overall Conclusion
The Motorola MotoACTV appears to be a really great tool for cyclists.

Motorola, fix these 3 things and it would be THE perfect device for cyclists:
  1. Let you export the data from the device as .tcx so that it works with Strava, Ride with GPS, and other logging sites
  2. Fix the terrible bike mount, it's MUCH too easy to accidentally slide it off.
  3. Let you import maps & directions from a .gpx file, or better yet, from Google Maps or something

Sunday, February 26, 2012

Project Sleipnir - The Search

Now that I know what I want I have to figure out where on earth to get it.

There's a few manufacturers that I love, but quite frankly could never really afford. Firefly, English Cycles, Baum Cycles, and a bunch of others that start at about $5000-8000 for a complete bike.

From there I looked towards people that met the following characteristics:

  1. Knew or understood how to design bikes for tall people
  2. Was a good value
And if I could find somebody local that met the above two, then that would be preferable as I could be more involved in the design process.

Based on those qualifications I started with the following builders:

  • Zinn Cycles
    • This guy is the king of tall. He's my height, used to race professionally, but was put off by the terrible design of tall bikes (like me, but his life was at stake).
    • Unfortunately because of the more experimental nature of the geometry I was aiming for his pricing was a bit outside of the range that I could really justify, plus the bikes aren't really that cool looking. Definitely function over form:
  • Curtlo Cycles
    • Found out about this guy via some internet forums. Also fits the tall bill well, and is very affordable. Plus his bikes are a really good value as he does them all in a big batch. 
    • Unfortunately though, it's hard to know when he's going to do a batch, so you could easily wait 3 weeks or a full year for your bike to be made. Also a function over form builder.
  • Alchemy Handmade Bicycles
    • Local builder that makes some absolutely beautiful bikes, the welds on their frames are amazing. They also do a really good fit process to guarantee a great fit. I even went so far as to get a fitting from them.
    • Unfortunately they fired their welder and are currently making the move to be a bigger company with higher volumes. Add to that there was some crossed communications between us and it just seemed like they were more interested in building their bike for me than building the bike I was looking for. 
  • Tue Fabrication Bicycles - 
    • These guys are local. VERY local, as in the builder actually works on the same floor I do and just 3 rows of cubicals down. They do a wide spectrum of bikes, that are a good balance of form and function on a broad spectrum of bikes. One thing I really loved is that they liked some of my ideas and didn't just say "No, you don't want to do that" instead they seemed excited and interested. That meant the world to me, add to that they are a very very good value and they quickly went to the top of my list.
Based on price, location, and desire/willingness/ability to make a bike for a tall person TRUE fabrication was who I selected to do my build.

Once I put down a deposit we were ready to go. They had a few other bikes before me in the build queue, so I had a couple months to really refine what I wanted. 

And it turned that waiting was actually fairly key in being able to get some of the pieces that I would need.

Wednesday, February 22, 2012

Project Sleipnir - The Desires

Part 3 of 7 in Project Sleipnir

There's really 2 bikes that I lust after:
  1. The Do-Anything Bike
    A do anything, go anywhere bike that can have fat tires and do a cyclocross race; throw on a set of skinny tires and hang with the roadies; or put on some wider slicks, some fenders, a dynamo, and a trailer and do a tour of the US or world.
  2. The Pure Road Bike
    This bike only goes on the road and it's fast, light, nimble, and has the best tech that you can throw at it. Electronic shifting, fat carbon rims, and counting each gram for each piece. 
Sadly #2 is not really possible for me right now. Between the high price of electronic shifting and carbon rims, combined with the fact that to make a light bike like that I would have to use much more expensive custom-made carbon fiber or titanium, it's just out of my price range.

So that leads to the do-anything bike.

List of Desires for a Do-Anything Bike:
  • Meets all of The Requirements
  • Looks proportionate
  • Hardware
    • Disc brakes
      • Preferably hydraulic
    • Carbon fiber front fork
    • Has internal routing of the cables
Looks Proportionate
One area where bikes for tall people often fail is how they look. Take me. Unless you have something for reference you could see a picture of me and I wouldn't look very different from anybody else. Sure I'm taller, but I'm also wider and deeper. I've got bigger hands, wider shoulders, longer feet, and a huge brain. So if all of me scales, why is it that when people think of a bike for a tall person they only think to make it taller, even dangerously so.

Why do they turn a thing of beauty like this:


Into a gangly monstrosity like this:
Also of note, the guy that rides this bike is the same height as I

If you simply made a taller person by just stretching them up and not adding anything else then they would easily break, topple, or otherwise be maimed. It just doesn't work that way on people, and in my opinion it shouldn't work that way on objects used by those people either.

One of my top goals on this project was to figure out how to make a bike that managed to not only get stretched upwards, but also lengthen and get stronger to accommodate my larger body.

To do this I started fairly basic. I looked at some of the bikes that inspire me: Specialized Roubaix, Salsa Vaya, Cannondale CAAD10, Soma Double-Cross, Specialized Crux Disc, Fixie Pure Blood, and a few others. From there I looked at their model that would best fit a normal 5'9" rider, usually a 56-7cm frameset. From there I broke down the bike as a set of proportions instead of raw dimensions. 

Note: One thing of interest is that there is actually a very very finely tuned window of fore-aft weight distribution of bikes as it relates to the bottom bracket (BB) position and the overall wheelbase. Faster road bikes will put things at 59.5% fore and 40.5% aft of the BB, and more relaxed tourers are at about 58% fore and 42% aft of the BB. This is a surprisingly narrow window between twitchy sport and relaxed tourer. But what was even more surprising was that bikes for tall people are often 61% fore and 39% aft of the BB. Meaning there is as much difference between a touring bike and a twitchy fast bike as there is between a fast bike in a normal size and a fast bike in a tall size. This basically means that tall bikes are less stable and even more twitchy even in the same models than they should be and by a fairly drastic margin. 

Once I had a good idea for what the proportions were I then scaled up by 13% (5'9" x 113% = 6'6"). This yielded some interesting results and while not a hard blueprint did provide the guidelines for what I was looking for overall. I was aiming for a bike that had a wheelbase of 1100-1150mm (vs 990-1010mm for normal guys) and a chain stay (that back piece from Requirement #2) that was about 450-480mm (vs 400-420mm for normal guys).

I then mocked up the scaling in a CAD application and everything looked great, except for one piece...the wheels. Unfortunately you can't scale the wheels; therefore things did look pretty much the same on the scaled version except for that the wheels looked a bit smaller and to keep the same height from the road those smaller wheels have to be pushed down a bit. All-in-all though the scaled version of the bike seemed to work very well both mathematically and as a model.
One of my CAD drawings. 
While larger than normal it's not gangly.

When things work right as math and also look right on paper, then you're in good shape. Therefore, I was pretty happy to move forward in the Looks Proportionate department.

Hardware - Brakes
From having ridden around on my current bike for a few thousand miles there is one thing that was number one on my list of must-not haves...Cantilever Brakes. They're hard to set up, prone to squealing, and are terrible in the wet.

Fortunately there's been a bit of a move in the road-biking world to get disc brakes on bikes, and that really seems like the way to go for me. You get much more consistent braking (even in wet conditions) with discs and you can brake with much less effort.

In my mind discs brakes are simply the best way to stop a moving wheel, and the main reason that you don't see it on more bikes is people waiting out to see if the new tech will stick.

Additionally I really wanted hydraulic disc brakes, but when I started looking into building a bike they didn't exist for road bikes. Hydraulic brakes provide better control of your braking power, which is something I really crave given how little of it there is in my current cantilever brake setup. Sadly though, nobody (yet) makes hydraulic brakes for a road-bike, so this definitely poses a problem. But then as time progressed in the build process something very exciting (to me) happened. During EuroBike 2011 there were many manufacturers that came out with cable to hydraulic conversion systems. This opened the door to use standard road-bike levers, but get to have the advantages of a hydraulic braking system. Another added bonus is that the overall weight of the system is less than that of a cable-pull system all while giving more power with existing pieces. Best of all worlds!

There were a lot of designs shown, but this is the one that I fell in love with:
Hope V-Twin Cable to Hydraulic Brake Converter

The only real downsides were that these products only existed in prototype form and that prices weren't released. So these were mostly a dream. But the disc brakes were going to happen even if I had to use the lowly Avid BB7.

Hardware - Carbon Disc-Compatible Fork
To run discs means you need them in front and rear. But another challenge of this build is that when I started the only possibility of getting disc brakes on the front would be to use a steel fork. Steel is great for a lot of things, it even makes a decent fork. But the best material for a fork on a bicycle is far and away carbon fiber. (Carbon Fork Strength vs. Steel Fork Strength).

If possible carbon fiber is the best way to go by leaps and bounds for this piece of the puzzle.

Hardware - Internal Cable Routing
After having all of my frames get scratched up by their cables at some point or another I've decided that's enough. I don't care if it makes my next bike weigh more, I want all of the cables to be internally routed. That way you only see the cables controlling the gearing and brakes come out of the handlebars, disappear into the frame and then only re-appear near where they are actually being used.


vs. 
Exeternal Routing vs. Internal Routing

I like the clean look it gives the bike, plus it allows me to use full-length cable housing which will mean that my cables are less likely to get blocked up with dirt and grime.

Desires Conclusion
Now that I know what I want and how I want it done, it was time to go and find somebody that could help me turn these pieces into a reality.

Tuesday, February 21, 2012

Project Sleipnir - The Requirements

Part 2 of 7 in Project Sleipnir

Quite simply, I don't fit my bike. 

At its root, getting a proper fit is pretty simple. There are only three places where your body touches a bike:
  1. Feet
  2. Butt
  3. Hands 
Feet
If you think about it, spinning a crank on a bike is a lot like climbing a flight of stairs. You essentially take a step up, then another, then another. But cranks (just like stairs) are only made in a size that fits the majority of people. But what that means for somebody like me is that if you want to go up quickly, that you have to take all these tiny little bitty steps really fast. Or you can do what most of us taller folk do, you can go two steps at a time. It's easier on the body and faster at the same time. 

This same basic principle should apply to spinning cranks too. Longer legs can and should move further per step than shorter legs. Unfortunately due to the nature of mass-marketing things to people they bless us with making 2 standard sizes of cranks: 170mm and 175mm. If you're lucky enough to be 'normal' then these sizes are great. 5'8"-10" are perfect. But this means if you're 5' tall you have to push and pull much further than your body would really like. And if you're 6'6" tall you have to make these movements that are much smaller than you should make.

But then the question is "How much bigger is best?" 
There's not a perfectly solid answer on that, but there are a couple of interesting pieces out there to help find that answer:
Both of these (and many other sources) indicate something in the 20-21% of inseam is the ideal length. And when it comes to proportions I'll trust a percentage or ratio any day over somebody saying, that a 5'9" and 6'6" person need the same size crank. Similarly if you look at the size difference between the tall person and the normal sized person you'll see that the tall person is about 113% (78/69 = 1.13) the size of the normal guy. Apply that math to the normal cranks (175mm * 1.13 = 198mm), and you'll find the tall guy would be better off with something in the 200mm range. 

That number is surprisingly close to what I needed based off of various crank calculators. And now we have the first requirement:
Requirement #1 - Bike must fit 200mm cranks

That requirement actually poses a whole host of issues which we'll work out later.

Butt
One part of fitting properly on a bike is making sure your knees are not too far in front of the cranks. Doing that would put a lot of extra strain on a hyper-flexed knee joint and that will lead to lots of problems later. But to make that work on somebody with a long femur that means you have to push them back...way back.

There's a couple of problems with that. If you go back further your handlebars are now too far in front of you. Additionally because the person with long legs will also need the seat up really high and the angle of the seat tube you can end up with the butt's contact points being almost directly above the rear wheel. 

Being so far back actually changes the handling of the bike. Even on a flat your weight distribution is greatly changed from the optimum that's been honed over the past 170 years of the bicycle. But things get much worse on a slope where you actually end up pulling wheelies, which can get nerve wracking.

I made a simple diagram to show this below 
Figure 1: As the seat-tube gets longer and seat has to slide back the relative position of the rider's weight in relation to the rear wheel is adversely altered.

Therefore we now have the basis for the second requirement:
Requirement #2 - The position of my butt must remain the same relative distance from the rear hub as on a normally-sized bike

Hands
The final fundamental piece of fitting properly on a bike is where are your hands relative to the rest of you. Since the fundamental center of a bike is the axis on which the crank rotates, the best way of determining where your hands go is based on how high up your seat goes and then how far forward your arms and torso go.

The whole premise is summed up well by Lennard Zinn in this column on Stack and Reach
Figure 2: Stack and Reach for Frame and Handlebars

How this relates to the dynamics of riding that bike:
  1. If you stretch too far up and forward your shoulders and neck will ache terribly. 
  2. If you go too far low and forward and not only will your shoulders ache, but you'll also cut off blood-flow to your baby-making fun factory. 
  3. If you go too far up and back your handling is worse and it's hard to go fast.
  4. If you go too far low and back your knees hit the handlebars...which means you don't go anywhere.
There's actually a narrow range of what works to make you both fast and comfortable. Unfortunately this is one of the top areas where I currently suffer. Because the seat is so far back I have to stretch too far for the handlebars. Because I'm tall and my current bike isn't, I have to go low...making man-bits suffer and shoulders ache with creaking fire. Since that is unacceptable I've had to compromise a lot on bike handling and get up and back to the point of the near-ridiculous. This also puts me even further back on the bike exaggerating the problems seen in Figure 1.

The final requirement is actually pretty simple and the gist of the whole project:
Requirement #3 - The bike needs to fit my body

Requirements Conclusion
Looking around there wasn't a single bike or frame available for purchase that met all 3 of my requirements.

I actually almost lucked out with the KHS Flite 747 as it is the only production bike that meets Requirement #1. And based on the measurements it likely meets Requirements #3. Sadly Requirement #2 was sacrificed at the alter of mass-marketability. And another problem with this bike is that nobody has one of these in stock. They're pretty much a buy-and-pray-it-works bike. Combine that with a few features weren't what I was really was hoping for and it's off the list.

Fortunately for me I actually did find a bike that fit my body much like I wanted it to. The Specialized Roubaix in a size 64. Unfortunately although only the 3rd requirement was met and Requirements #1 & #2 were completely ignored. Still good news though as I was able to find some basis for what kind of fit my body needed on a bike. Plus with a $4000 sticker price, no used ones for sale ever, and the fact that the components were not really my preferences it would be a big bill for something that wasn't quite what I'm looking for.

Therefore since nothing exists on the market that meets my requirements that means that I would need to have my next bike custom built.

...and if you're going to custom build a bike you may as well unleash your imagination a bit and see what you can make.

Project Sleipnir - The Intro

I've really gotten into biking lately. Love it. I commute when possible. I ride on the weekends by myself. I ride on the weekends with friends. I ride with my dog on trails. I ride by myself on trails. I ride during my lunch breaks with coworkers. I ride when it's wet. I ride when it's cold. I ride when it's ridic hot. I ride up all the hills. I ride into the wind. I ride into town for errands. I ride in the mud on purpose. When I'm not riding I'm probably thinking about riding. Or I'm talking about riding with people on the internet. I've ridden my bikes thousands of miles a year for at least the past couple of years, and that's a number I hope only goes up.

Bottom line
I love riding bikes. Always have.

The only real downside of riding is a problem I have with everything else in life (chairs, clothes, cars, shoes, etc.). Because I'm so tall I don't really fit well on anything you can just run out and buy at a store. I can get close mind you. But no matter which way you look at it, there's a difference between rolling up all your sleeves because they don't go all the way down to your wrists and having a shirt that just cuffs at your wrists instead of your forearms because it was tailored to you. And that's what I'm looking for in a bike. Sure I can ride just about any bike out there and I'll have fun, but there's always been a yearning for something that fits me right and from that yearning Project Sleipnir was born.

What is Project Sleipnir? Sleipnir is the Norse God Odin's horse. Sleipnir rode to Hel and back and kept his rider safe the entire trip. Sleipnir was huge. Sleipnir was the best of all the horses.
Huge, the best of all the others, and can take me safely to Hel and back. Sleipnir is what I am looking for in my future steed.

About mid-2011 the dream of building a bike that just fit took me and wouldn't let go. I wanted to make something that was uniquely mine and also a bit of a work of art and science. I certainly didn't want to just go grab something off the shelf and say, "This'll do." I wanted to be involved with the process from the ground up. This project comes to its completion in a week or two; therefore, I wanted to document a bit of the overall process that's consumed me for the past few months.

I'm going to break this story into the following chunks:
  1. The Intro
  2. The Requirements
  3. The Desires
  4. The Search
  5. The Set-Backs
  6. The Build
  7. The Completion